
Regular transmission oil changes are essential for maintaining smooth gear operation and preventing damage. This guide provides step-by-step instructions to help you perform the process safely and effectively.
1.1 Importance of Regular Transmission Oil Changes
Regular transmission oil changes are vital for maintaining the health and performance of your manual transmission. The oil lubricates gears, prevents corrosion, and keeps internal components cool. Over time, the fluid degrades, losing its ability to protect moving parts effectively. Neglecting regular changes can lead to increased wear and tear, corrosion, and costly repairs. Fresh oil ensures smooth gear shifts, reduces friction, and extends the lifespan of the transmission. It’s a simple yet critical maintenance task to avoid premature component failure and ensure optimal vehicle performance.
1.2 Safety Precautions and Tools Needed
Before starting, ensure you wear protective gloves and eyewear. Gather essential tools like a socket set, drain pan, torque wrench, and new gaskets. Jack up the car on level ground and use jack stands for stability. Never work under an unsupported vehicle. Collect used oil in a sealed container for proper disposal. Refer to your vehicle’s manual for specific torque values and recommendations. Always follow local regulations for waste disposal to protect the environment.

Preparing Your Vehicle
Ensure your car is securely raised and sitting level to access the transmission. This setup guarantees accurate oil levels during the change.
2.1 Getting Your Car in the Air and Sitting Level
Raising your car ensures access to the transmission. Use a jack to lift it and secure it with jack stands. Ensure the vehicle is level to prevent oil from flowing unevenly. A level car guarantees accurate oil drainage and refilling. This step is crucial for safety and proper transmission function. Always double-check the car’s stability before starting work. Leveling also helps maintain the correct oil level during refilling, ensuring optimal transmission performance. Proper elevation and leveling are the foundation of a successful manual transmission oil change.
2.2 Ensuring the Car is Securely Supported
To safely change the manual transmission oil, your car must be securely supported. Use jack stands to lift the vehicle and ensure it is level. This prevents accidents and ensures proper oil drainage. Always follow the manufacturer’s guidelines for lifting points to avoid damaging the car’s frame or undercarriage. Double-check that all supports are stable before starting work underneath the vehicle. Safety is paramount to avoid injuries or damage during the process.

Tools and Materials Required
Essential tools include a drain pan, wrench, socket set, torque wrench, and funnel. Materials needed are new transmission oil, a filter, and replacement gaskets.
3.1 Essential Tools for the Job
To change manual transmission oil, you’ll need a drain pan, socket or wrench for the drain plug, a torque wrench, and a funnel. A fluid transfer pump is also handy for refilling. Ensure you have new gaskets, a replacement filter, and rags for cleaning. Gather all tools beforehand to streamline the process and avoid delays. Proper equipment ensures safety and efficiency during the transmission oil change procedure.
3.2 Recommended Oil and Filter Specifications
Use 75W-80 gear oil, as specified in most manuals, for optimal lubrication and protection; Ensure the oil meets API GL-4 standards for manual transmissions. The filter should be compatible with your transmission type, often found in the owner’s manual. Replace the gasket with a new one to prevent leaks. Always verify torque specifications for the drain bolt, typically around 22-29 ft-lb, to secure it properly. Proper oil viscosity ensures smooth gear operation and prevents overheating. Follow manufacturer guidelines for filter replacement intervals, usually every 30,000 to 60,000 miles. Use high-quality materials to maintain transmission performance and longevity.

Draining the Old Transmission Oil
Locate the transmission fluid pan and drain plug. Place a collection pan underneath. Unscrew the drain bolt, allowing the oil to flow freely. Replace the washer.
4.1 Locating the Transmission Fluid Pan
To locate the transmission fluid pan, raise the vehicle and support it securely. The pan is typically at the bottom of the transmission, near the front of the car. It’s a metal pan bolted in place. Look for bolts around the edges and a drain plug at the bottom. Ensure you’ve identified the correct pan to avoid confusion with the engine oil pan. Once located, you’re ready to proceed with draining the old transmission oil.
4.2 Removing the Drain Plug and Allowing the Oil to Flow
Once the transmission pan is accessible, use a socket wrench to remove the drain plug. Position a large drain pan directly beneath to catch the old oil. Allow the fluid to flow completely before proceeding. Be cautious, as the oil may drain quickly and splatter. Ensure the area is clear of any flammable materials. Once the flow slows to drips, the old oil has been successfully drained. This step is crucial for ensuring the transmission is free of contaminants before refilling with fresh oil.
4.3 Replacing the Drain Plug and Gasket
After draining, clean the drain plug and surrounding area. Inspect the gasket for wear or damage. Replace it if necessary to prevent leaks. Reinstall the drain plug, ensuring it’s securely tightened to the recommended torque specification (typically around 22-29 ft-lb). Avoid overtightening to prevent stripping threads. Replace the crush washer if your vehicle uses one. Double-check the tightness and inspect for any signs of leakage before proceeding. This step is critical for maintaining the integrity of your transmission system.

Refilling the Transmission with New Oil
Use a pump to fill the transmission with the recommended oil type and viscosity. Ensure the oil level matches the manufacturer’s specifications for proper gear function.
5.1 Using a Pump to Fill the Transmission
After draining the old oil, attach a pump to the new transmission fluid bottle. Insert the pump’s nozzle into the transmission’s fill port, located near the drain plug. Gently squeeze the pump to dispense the fluid until it reaches the recommended level. Use a dipstick or level gauge to verify the oil level matches the manufacturer’s specifications. Ensure the fluid type and viscosity align with your vehicle’s requirements for optimal performance. Avoid overfilling, as this can damage the transmission.
Once filled, replace the fill plug and tighten it to the specified torque to prevent leaks. Double-check the oil level before lowering the car and test the transmission during a short drive to ensure smooth operation.
5.2 Ensuring the Correct Oil Level
After refilling the transmission, use a dipstick or level gauge to verify the oil level. Ensure the car is on level ground and the transmission is at operating temperature. Refer to your vehicle’s manual for the correct oil level markings. If the level is too low, add small amounts of oil until it reaches the recommended mark. Avoid overfilling, as this can cause pressure issues. Start the engine, shift through all gears, and check the level again to ensure accuracy and proper lubrication throughout the system.
5.3 Checking the Oil for Proper Viscosity and Type
Always verify the new transmission oil matches the manufacturer’s recommended viscosity and type. Consult your vehicle’s manual for specific specifications. Using the wrong oil can damage the transmission. Ensure the oil is designed for manual transmissions and suits your climate conditions. Proper viscosity ensures smooth gear engagement and protects against heat and wear. Double-check the oil label to confirm it meets the required standards before refilling.

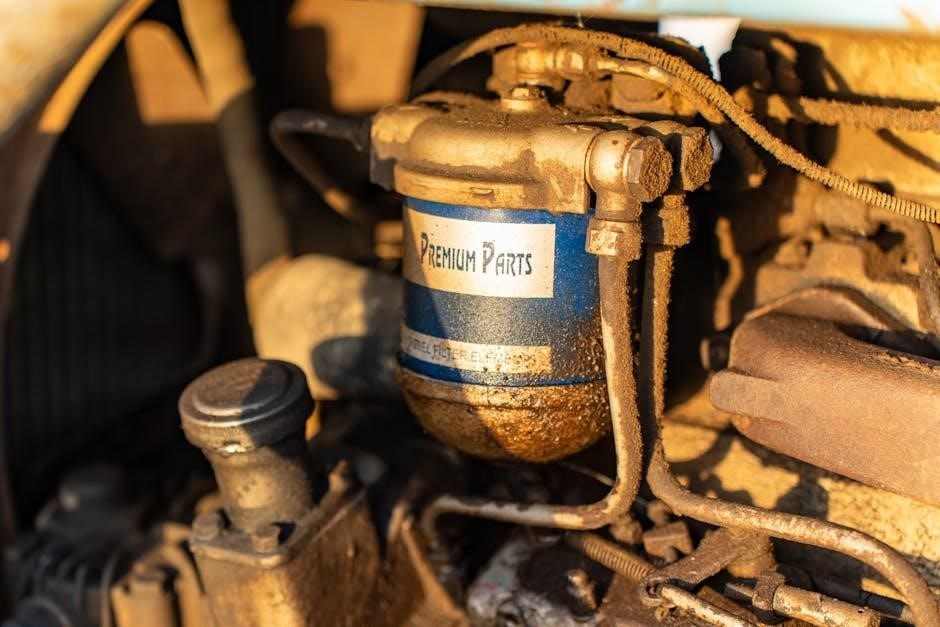
Replacing the Transmission Fluid Filter
Evaluating the transmission fluid filter is crucial for optimal performance; Installing a new filter with fresh gaskets ensures a proper seal, preventing leaks and contamination.
6.1 Evaluating the Transmission Fluid Filter
Before replacing the transmission fluid filter, inspect it for any signs of damage or leaks. Check the gasket for wear or cracks, as a compromised gasket can lead to fluid leaks. Ensure the filter is securely attached and functioning properly. If the filter is dirty or shows signs of degradation, it should be replaced to maintain optimal transmission performance. Always use a high-quality filter compatible with your vehicle’s specifications for the best results. This step is crucial for ensuring the new oil remains clean and the transmission operates smoothly.
6.2 Installing a New Filter and Gaskets
After evaluating the old filter, install a new transmission fluid filter by hand tightening it to ensure a proper seal. Replace any worn-out gaskets to prevent leaks. Use a wrench to secure the filter according to the manufacturer’s torque specifications. Ensure the gaskets are correctly positioned to maintain the integrity of the system. This step is crucial for maintaining clean oil flow and protecting the transmission from contaminants. Proper installation ensures optimal performance and longevity of the transmission.

Proper Disposal of Used Oil and Materials
Collect used oil in a sealed container and store it safely. Follow local regulations for disposing of hazardous waste to ensure environmentally responsible disposal practices.
7.1 Collecting and Storing Used Oil
After draining the old transmission oil, carefully collect it in a leak-proof pan. Store the used oil in sealed, disposable containers. Ensure the containers are labeled and secure to prevent spills. Always dispose of used oil and filters responsibly by taking them to a recycling center or an auto parts store that accepts automotive fluids. Never dispose of used oil in the trash or down drains, as it can harm the environment. Clean any spills immediately and wash your hands thoroughly.
7.2 Following Local Regulations for Waste Disposal
Always dispose of used transmission oil and materials responsibly. Check local regulations for hazardous waste disposal, as improper disposal can harm the environment. Use an oil collection pan to capture all drained fluid and seal it in a leak-proof container. Do not pour used oil down drains or mix it with other waste. Take the used oil to a recycling center or an auto parts store that accepts used oil. Ensure compliance with local guidelines to protect the environment and avoid penalties.

Torque Specifications for Transmission Bolts
Tighten the drain bolt to 29 ft-lb (39 N-m) and ensure all bolts are securely torqued to prevent leaks and maintain transmission integrity.
8.1 Tightening the Drain Bolt to the Correct Torque
Tightening the drain bolt to the specified torque is crucial to prevent leaks and ensure proper sealing. Use a torque wrench to secure the bolt at the recommended torque, typically around 29 ft-lb or 39 N-m, depending on your vehicle’s specifications. Replace the washer if it shows signs of wear. Over-tightening can damage the transmission pan, while under-tightening may lead to oil leaks. Always consult your vehicle’s manual for accurate torque values to ensure a secure and leak-free connection.
8;2 Ensuring All Bolts Are Properly Secured
After replacing the drain plug and refilling the transmission oil, ensure all bolts are tightened to the manufacturer’s specified torque values. Refer to your vehicle’s manual for precise torque specifications. Double-check the drain bolt, filler plug, and any other bolts to confirm they are securely fastened. Properly securing these components prevents leaks and ensures optimal transmission performance. Always use a torque wrench for accuracy and avoid over-tightening, which could damage threads or strip bolts.

Cleaning the Transmission Magnet
Clean the transmission magnet by removing accumulated metal shavings. This ensures the magnet continues to collect debris effectively, protecting your transmission from contamination.
9.1 Removing Metal Shavings from the Magnet
Locate the transmission magnet, which collects metal shavings from the oil. Use a clean rag or brush to gently remove the shavings, ensuring no debris remains. Inspect the magnet for any stubborn particles and repeat the process until clean. Properly dispose of the collected metal shavings. Cleaning the magnet prevents contaminants from re-entering the transmission, ensuring optimal performance and longevity of the system. This step is crucial for maintaining the health of your manual transmission.
9.2 Reinstalling the Cleaned Magnet
Once the magnet is free of metal shavings, carefully reinstall it in its original position. Ensure it is securely fastened to prevent any loose particles from interfering with the transmission’s operation. Double-check that the magnet is properly seated and aligned to avoid any potential damage. Tighten any bolts or clips according to the manufacturer’s torque specifications, typically around 22 ft-lb, to ensure a secure fit. This step is critical for maintaining the transmission’s efficiency and longevity.
Final Checks and Test Drive
Inspect for leaks, ensure the oil level is correct, and take a short drive to verify smooth transmission operation. Recheck the oil level after driving.
10.1 Inspecting for Leaks
After refilling the transmission oil, inspect the drain plug, gasket, and filler plug for any signs of leaks. Ensure all bolts are tightened to the correct torque specifications. Place a clean rag or paper under the transmission to check for drips. If no leaks are found, proceed to test the vehicle. A leak-free system ensures proper lubrication and prevents damage to transmission components.
10.2 Testing the Transmission with a Short Drive
After completing the oil change, take the vehicle for a short drive to ensure proper transmission function. Start the engine, let it warm up, and check for leaks. Drive slowly, shifting through all gears to verify smooth operation. Listen for unusual noises or vibrations. If everything feels normal, the job is successful. This step ensures the new oil circulates properly and confirms the transmission is functioning as expected.